In this new practical video tutorial I am going to teach you two different ways, valid for Root users and No Root users, with which we will do a complete cleaning of the battery stats file which will help us repair and calibrate the battery of your Android terminal to get the best performance that with the passage of time and bad habits, surely it has been diminishing considerably.
How do I tell you, I am going to explain two different ways to repair and calibrate the battery of your Android terminal, the first valid for No Root users, very simple to achieve through a recommended method on the page itself. LG.com. The other, specially designed for Root users and equally easy to apply. So now you know, if the battery of your Android terminal is no longer giving you the same autonomy to which you were accustomed, it is probably because you need to carry out a repair and calibration of it, which, which I will explain to you step by step just by clicking on «Keep reading this post».
How to repair and calibrate your Android battery

Step 1 - Repair battery, valid for Root and Non-root users
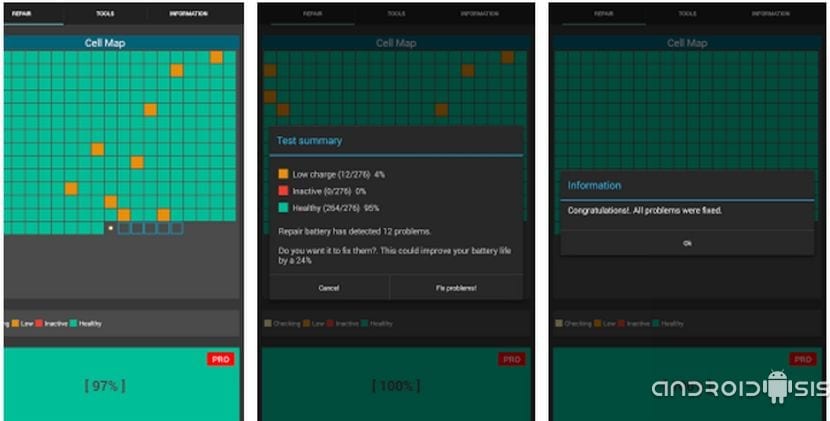
This first step of repair the battery of our Android terminal We are going to do it in a very simple way thanks to a free application for Android, located in the Google Play Store under the name of "Repair battery".
As you can see in the video attached to the header of this post, it is a very simple application, valid for Root and Non-root users, which will examine one by one the battery cells of our Android terminal to detect those that do not charge properly and proceed to repair them.

Step 2 - Calibrate the battery for No Root users
If we are No Root users, the method for a battery calibration of our Android is as simple as following these steps to the letter:
- We charge our Android with its original charger to the electrical outlet, no Powers Bank or personal computers, until you reach 100 x 100m of your load.
- We disconnect the terminal from the electrical current and we use it normally until the battery is completely drained and the terminal turns itself off.
- We let it turned off and not connected to the electrical current for six hours.
- After six hours of rest, we connect it to the electrical current and we leave it off until it charges the battery 100 x 100.
- Once it reaches 100 x 100 charge we left him still a couple of hours connected to the electric current and without turning it on.
- After those two extra hours we disconnect it and turn it on and We can now use it normally, trying to prevent the battery from draining completely. It is advisable to put it to charge when the terminal has around 15/20% battery.
- This process is recommended to do once every three or four months.
Step 2 Calibrate the battery for root users
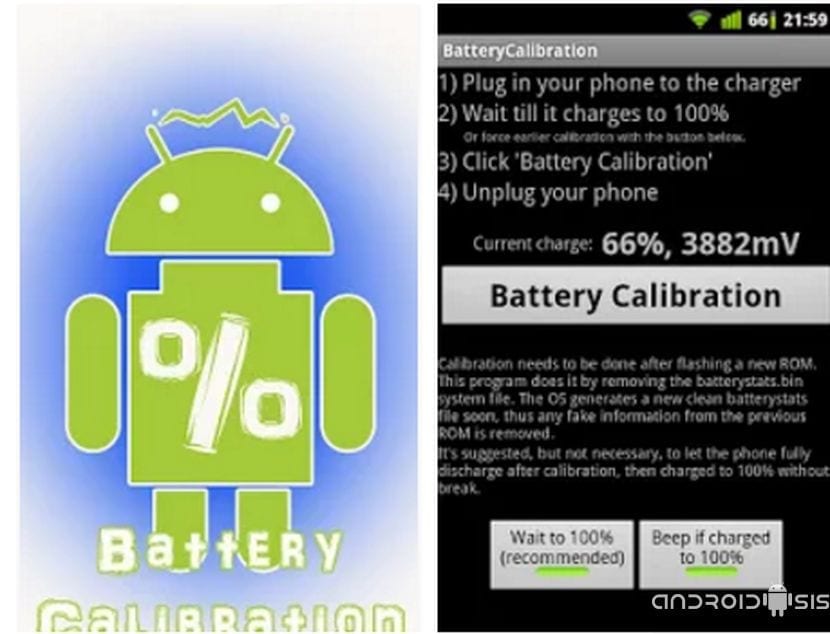
If we are Root users the process is as simple as download the Battery Calibration app from the Google Play Store and follow these simple steps:
- We connect our terminal to the electrical outlet, not Power Bank or personal computers.
- We open the application Battery Calibration and we wait for the battery to charge to 100 x 100.
- When the app tells us that the terminal is charged to 100 x 100 of its capacity, we leave it still connected to the current and charging for a couple more hours.
- After the two overtime hours, we press the button Calibrate Battery, we grant superuser permission and when we get the warning that the battery is already calibrated we disconnect the charger cable.
- We use our Android normally until drain the battery of the same and turn off by itself.
- We connect it to the electrical current and we leave it on and off until it reaches 100 x 100 of its capacity.
- Without disconnecting the terminal, once it is charged to 100 x 100 we turn it on and when it is completely started we proceed to disconnect the power cable and we will have properly calibrated battery.


excellent article!!!
The battery of my tablet is bad ... .. the battery is going down correctly 100% 99% 98% etc but where it tells you how many hours there is left of battery is the one that fails since first, for example, it appears you have 5 hours left 40 min. 2 hours the battery percentage decreases but the remaining time increases, I already have 70% but it appears to me that I have 7 hours 20 minutes of battery. I hope your prompt help