
In the next post, helped by several video tutorials and step by step, I will show you the best way to enjoy AndroidPC for ourselves thanks to the installation of RemixOS 2.0 directly on a Pendrive to be able to run it on any personal computer either desktop or laptop.
Before continuing with this tutorial you should know that, in order to install Android PC on a Pendrive thanks to RemixOS 2.0, we are going to need a personal computer, either desktop or laptop that has a 64-bit processor, so Those of you who have a computer based on X86 architectures, unfortunately, do not continue with this tutorial as it will not work for you. That said, I invite you to click on «Continue reading this post» where I tell you step by step, from scratch, the correct way to install Android PC on a Pendrive thanks to the RemixOS 2.0 team.
Requirements to meet to be able to test Android PC thanks to RemixOS 2.0
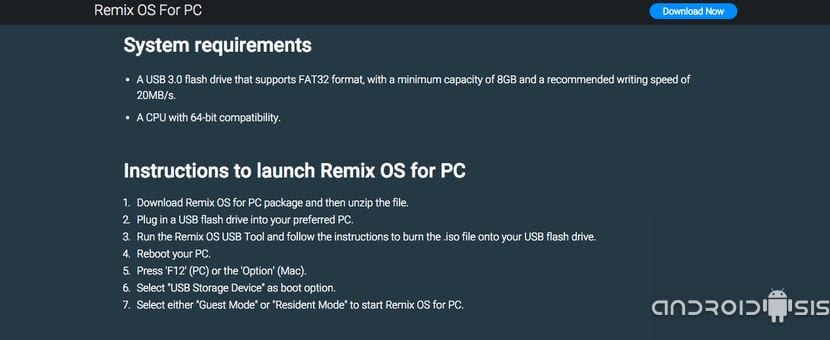
- Have a personal computer with 64-bit architecture
- Have a pendrive with a minimum capacity of 8 Gb with USB 3.0 technology and that it is able to write data to 10 mb / s or higher.
- Have access to the boot of our computer to modify the boot order and enable booting via USB.
These requirements are the minimum requirements that are required to be able to install Android PC thanks to RemixOS 2.0 and that the user experience is satisfactory. In my case I have done it with a Pendrive that is 2.0 technology and a maximum writing speed that did not reach 10 Mb / s, specifically its writing speed was 9 Mb / s. Even so, I have been able to test it with a fairly good user experience, although the lack of speed of the pendrive was quite noticeable to run RemixOS with ease.
Files needed to install RemixOS 2.0 on a USB
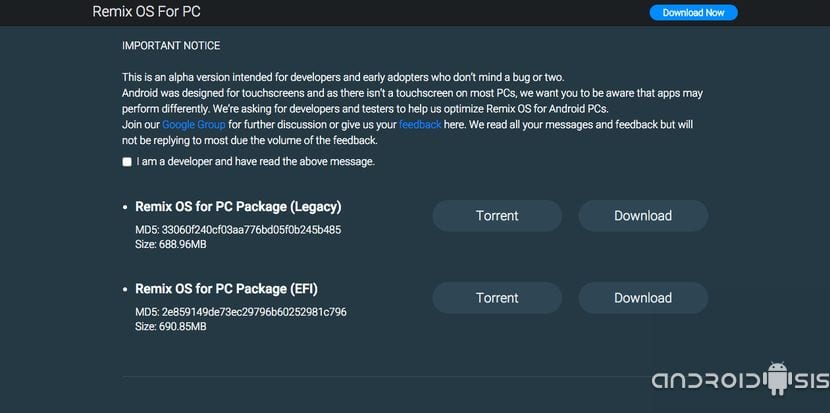
The only file that we will need to be able to test Android PC thanks to RemixOS 2.0 based on Android 5.1 Lollipop, is a compressed file in ZIP format, which we can download for free from the official website of RemixOS for PC clicking on this same link.
Once the file that weighs a little more than 600 Mb has been downloaded, we are going to unzip it and follow the instructions that in this video I leave you to be able to install the system image on a USB that is of a capacity greater than or equal to 8 Gb
In the video above I explain the bootable USB creation method with Android PC thanks to Remix OS 2.0In addition, I also explain the simple process of booting the system and the boot method so that the data is saved correctly after finishing the session in RemixOS 2.0.
For anyone who has problems or don't know how to access the BIOS of the personal computer in which you want to test RemixOS 2.0Then I leave you a video that I created a long time ago in which I explain how to access the BIOS, the boot management system of our personal computer and make the pertinent changes so that our computer is able to start from the new USB with RemixOs created in the previous step.
Finally, I recommend that you pay attention to Androidsis since in a next video tutorial I will teach you how to install Google services on RemixOS In order to have the official application store for Android, the Google Play Store, fully functional in RemixOS to be able to install and uninstall applications just as we would on our Android device.

I could never make it start, I made 2 attempts on 2 different PCs and I never boot, it stays on a sign that says ANDROID, I have read the tutorial and I did everything right.
Have you already checked what kind of BIOS your PC uses?
Right, check the type of BIOS to download the correct version and keep in mind that your PC must be 64-bit otherwise you will not be able to make it work.
Greetings friend.
It does not allow me to format in Fat32 but in fatExt or something like that ... and in NTFS. Is that why I still can't boot?
Use formatting software, or if you know how to use the Windows partition management system, you can try it out there.