

Android 應用程序屏幕上出現的所有元素都是視圖。 從文本或按鈕等單個元素到視圖組等容器。 由於涉及大量細節,該主題相當複雜,為了進一步探索可用的可能性,強烈建議訪問 官方文件。 在本教程中,我們將分析最流行的元素,包括視圖組和一些基本元素。
查看組
- 線性佈局
- 將元素分組在一行中,可以是垂直的也可以是水平的。
- 相對佈局
- 元素相對於彼此和邊距排列。 它是最靈活的,也是最常用的。
- 滾動視圖
- 它用於不適合屏幕的視圖。 它只能包含一個視圖或一組視圖,並自動添加滾動條。
- 表格佈局
- 將元素按行和列分組。 包含 TableRow 元素,這些元素又包含每個單元格的元素。
- 框架佈局
- 它旨在包含單個視圖。 如果添加更多,它們都會在左上角對齊並重疊。
- 絕對佈局
- 自 Android 1.5 版本起已棄用。 在此容器中,元素是通過從左上角開始的絕對坐標來引用的。 它因不適應不同尺寸的屏幕而被棄用,Android 1.5之後就開始流行。
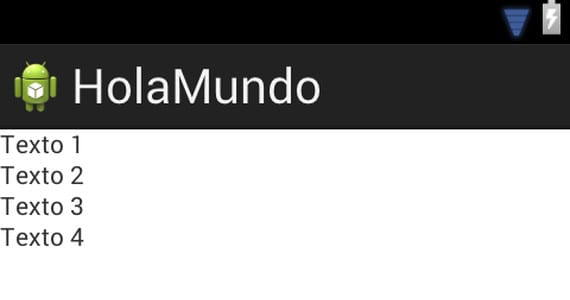
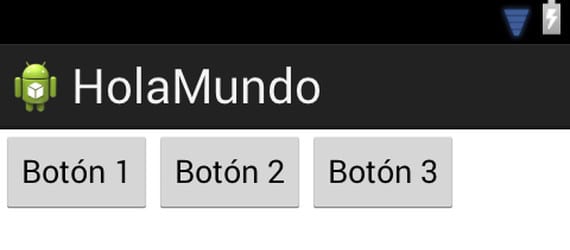
對於簡單的應用程序,最值得詳細研究的有趣組是 LinearLayout、RelativeLayout 和 ScrollView。 例如,我們可以製作一個 線性佈局 垂直包含文本,另一個水平包含按鈕:
[html]
<LinearLayout xmlns:android="http://schemas.android.com/apk/res/android"
安卓:layout_width =“match_parent”
安卓:layout_height =“match_parent”
機器人:方向=“垂直”>
<文字檢視
android:id="@+id/textView1"
安卓:layout_width =“wrap_content”
安卓:layout_height =“wrap_content”
android:text="文本 1"/>
<文字檢視
android:id="@+id/textView2"
安卓:layout_width =“wrap_content”
安卓:layout_height =“wrap_content”
android:text="文本 2"/>
<文字檢視
android:id="@+id/textView3"
安卓:layout_width =“wrap_content”
安卓:layout_height =“wrap_content”
android:text="文本 3"/>
<文字檢視
android:id="@+id/textView4"
安卓:layout_width =“wrap_content”
安卓:layout_height =“wrap_content”
android:text="文本 4"/>
[/html]
[html]
<LinearLayout xmlns:android="http://schemas.android.com/apk/res/android"
安卓:layout_width =“match_parent”
安卓:layout_height =“match_parent”
android:orientation="水平">
<按鈕
android:id="@+id/button1"
安卓:layout_width =“wrap_content”
安卓:layout_height =“wrap_content”
android:text="按鈕 1" />
<按鈕
android:id="@+id/button2"
安卓:layout_width =“wrap_content”
安卓:layout_height =“wrap_content”
android:text="按鈕 2" />
<按鈕
android:id="@+id/button3"
安卓:layout_width =“wrap_content”
安卓:layout_height =“wrap_content”
android:text="按鈕 3" />
[/html]
一 滾動視圖 它可以以非常簡單的方式組成,你只需包裝要滾動的容器即可:
安卓:layout_width =“fill_parent”
安卓:layout_height =“fill_parent”
xmlns:android="http://schemas.android.com/apk/res/android"
<...>
[/html]
<相對佈局
xmlns:android="http://schemas.android.com/apk/res/android"
安卓:layout_width =“match_parent”
android:layout_height="match_parent" >
<按鈕
android:id="@+id/button1"
安卓:layout_width =“wrap_content”
安卓:layout_height =“wrap_content”
android:layout_alignParentLeft="true"
機器人:layout_alignParentTop =“真”
android:text="按鈕 1" />
<按鈕
android:id="@+id/button2"
安卓:layout_width =“wrap_content”
安卓:layout_height =“wrap_content”
機器人:layout_alignParentRight =“真”
機器人:layout_alignParentTop =“真”
android:layout_toRightOf="@+id/button1"
android:text="按鈕 2" />
[/ html]
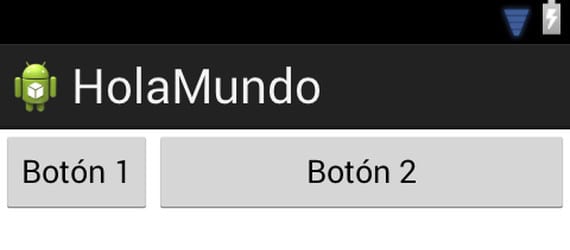
在此示例中,第一個按鈕與容器的左側和頂部邊距對齊,按鈕 2 與按鈕 1 的頂部、右側和右側邊距對齊。
極目遠眺
- 文本視圖
- 顯示固定文本。
- 編輯文字
- 包含可編輯的文本。
- 按
- 簡單的按鈕。
- 圖像按鈕
- 此按鈕允許您顯示圖像而不是文本
- 切換按鈕
- 可以保持按下狀態直到再次按下的按鈕。
- 複選框
- 類似於 ToggleButton 的按鈕,其工作方式類似於復選框。
我們已經了解了 TextView 的工作原理,因為它只需要包含文本。 在裡面 官方文件 我們可以找到更高級的選項,例如更改字體、文本大小、顏色等等。
這些按鈕更有趣,因為我們必須以某種方式將操作與它們關聯起來。 我們將看到兩種方式。 其一,我們直接將操作關聯到活動代碼中:
按鈕按鈕 = (按鈕) findViewById(R.id.button1);
按鈕.setOnClickListener(new View.OnClickListener() {
public void onClick(視圖v){
DisplayToast("您已按下按鈕");
}
});
[/ html]
這裡的鍵是我們為 XML 文件中的元素賦予的 id,我們需要它在代碼中定位它。 有了它,我們就可以關聯我們需要的操作。 另一種選擇是在按鈕 XML 中包含元素“android:onClick=”btnClicked”,然後將具有指定名稱的方法直接添加到活動代碼中:
[HTML]
public void onClick(視圖v){
DisplayToast("您已按下按鈕");
}
[/ html]
對於 CheckBox 或 ToggleButton,我們可以執行與第一種方法類似的操作。 我們通過 findViewById 獲取引用,並應用以下代碼片段:
[HTML]
按鈕.setOnCheckedChangeListener(new OnCheckedChangeListener() {
@Override public void onCheckedChanged(CompoundButton buttonView, boolean isChecked) {
if (isChecked) DisplayToast("您已激活該按鈕");
else DisplayToast("您已禁用該按鈕");
}
});
[/ html]

你好,母狗,我的名字是山羊
我想和伊万做愛
多麼好的社區啊,多麼好的社區,這是一個黑鬼的社區,不值一毛錢,但很泥濘
我想和楚他媽的
如何安裝 apk? 緊迫的!!
您獲取 apk 文件並將其複製到您決定安裝的終端的 SD 卡或內存中。 然後,使用任何文件資源管理器,輸入粘貼它的路徑,然後單擊它將自動運行。 如果它返回一個帶有顯示設置按鈕的窗口,您必須單擊它來激活權限才能安裝來自未知來源的應用程序。
先生。 Android 符號系統的含義是什麼?
L
您的建築面積有一個 20 米長的皮托特 (PITOTE),LA CHIVA 將其吞噬
說的部分
public void onClick(視圖v){
DisplayToast("您已按下按鈕");
}
應該
公共無效btnClicked(查看v){
DisplayToast("您已按下按鈕");
}